Connect 4 as Player 2: The Odd-Even Strategy Explained

Discuss this article with your favorite AI assistant
Direct Answer: As Player 2 against a center-column opening, you cannot force a win — Connect 4 was solved in 1988, and with perfect play the first player wins. Your job is to fight for a draw by claiming the even rows (2, 4, 6) and staying in the even columns (2, 4, 6), then punish the first player's mistakes with even-row threats. The moment they slip, flip the game with a diagonal play and steal the win.
What the 1988 Solution Means for Player 2
Connect 4 is a solved game. In October 1988, James D. Allen and Victor Allis independently proved that with perfect play, Player 1 wins — computer search later confirmed a 41-move win by opening in the center column (column 4 of 7).
The opening outcomes follow from the solution: the first player's only winning first move is the center column. Open next to center (columns 3 or 5) and a perfect defender holds a draw; open on an edge column (1, 2, 6, or 7) and Player 2 can force the win.
That is why most casual opponents — and many low-difficulty AIs — hand you the game before move two. If your opponent opens anywhere except center, take the center yourself and convert. If they do open center, accept the math — then play the defense below, which punishes the first real mistake.
For the math behind the advantage, see Is Connect 4 Solved? The First-Player Advantage.
The Odd-Even Strategy, Explained Simply
The odd-even strategy (also called the zugzwang strategy) is the deepest idea in Connect 4, and it follows from one fact: turns alternate, so the board's squares split by parity.
- Player 1 moves on odd turns (1, 3, 5...). Player 2 moves on even turns (2, 4, 6...).
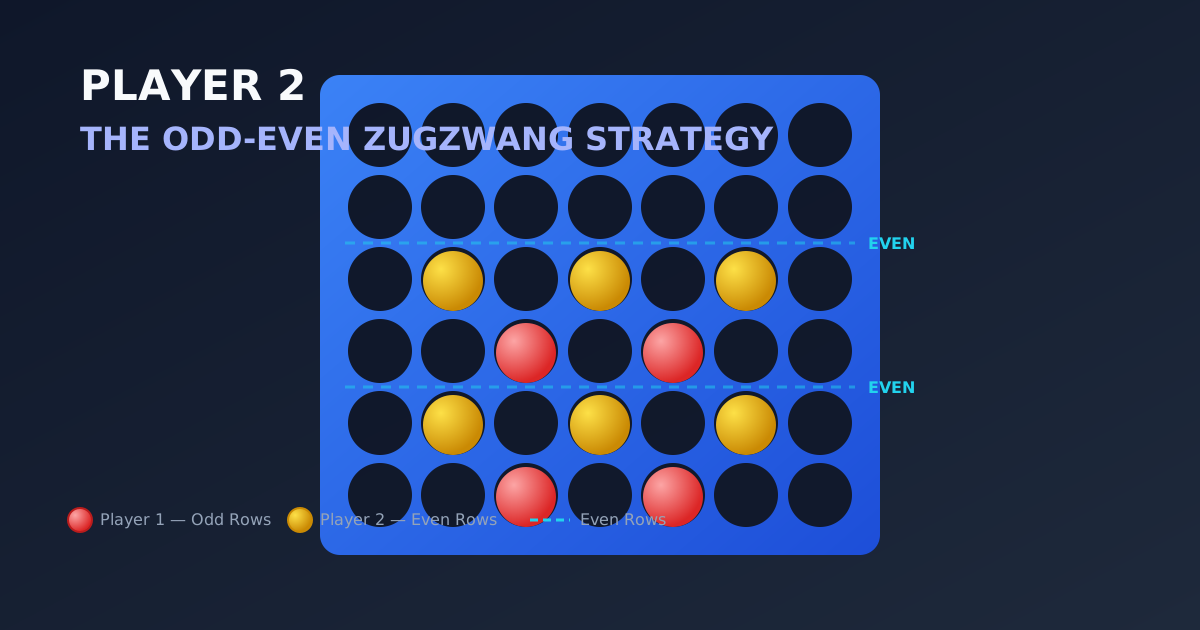
- Number rows 1 to 6 from the bottom: in any contested column, Player 1 fills the odd rows (1, 3, 5) and Player 2 fills the even rows (2, 4, 6).
- A "threat" is three of your pieces plus one playable square that completes four in a row. Odd-row threats favor Player 1; even-row threats favor Player 2.
Parity decides endgames because moves become forced as the board fills. Hold a threat on your parity row and the opponent is eventually forced to play the square below it — then you drop the winner. A threat on the wrong parity row gets filled by your opponent first, so it was never real.
Zugzwang is being forced to move when you would rather not. The player who controls the zugzwang decides how odd and even squares are divided — and that player wins. Allis showed the controller wins by "follow-up": answer every move in the same column, collect your parity squares, and the forced win appears.
One more rule: the undercut. When two threats sit in the same column, the lower one fires first — your even-row threat below their odd-row threat means you win first; their odd-row threat below yours means they win, so block it early.
The Even Columns Rule: Your First Moves as Player 2
After a center opening, your opening plan is simple: play in the even columns — 2, 4, and 6 — and never hand the first player a free odd row.
The best reply to a center opening is to stack the center: drop your first piece in column 4, on top of theirs. That claims row 2 of the center column — an even row in the most valuable column on the board — and the column splits by parity: they get rows 1, 3, 5; you get rows 2, 4, 6.
Keep the rest of your development on the even columns: 2 and 6 (and 4 while it stays open) are where your even-row threats live. Avoid casual moves in the odd columns (1, 3, 5, 7) — every odd-row square you give up is a potential winning square for them.
Your first three moves as Player 2:
- Stack the center column (row 2).
- Answer a wing push on the same side, staying in an even column.
- Start a threat pair across columns 2-4 or 4-6 — two threats they cannot both block.
For the mirror-image picture — how the first player attacks — open Connect Four vs AI as Player 1 and punish the openings you just learned to defend.
The 3x2 Rectangle Rule
The 3x2 rectangle is the tactical shape behind most Player 2 wins: a block three columns wide by two rows tall in which you control the key squares. Connect 4 analysis shows a 2x3 (or 3x2) rectangle is winning — it reduces to a 2x2 double threat the opponent cannot fully answer.
The Player 2 form is the classic "two stones in the second row": two of your pieces on row 2 (your parity row) inside a three-column window, with row-1 support below, create two winning squares at once. They can block one. Not both.
- Build it on your rows. As Player 2, the completing squares must land on even rows (2, 4, 6), or the pattern feeds the first player instead.
- Deny it on their rows. A first-player rectangle in the bottom two rows completes on odd rows (1, 3) — an odd-row threat that loses you the game. Block it early.
- Two rectangles beat one. One on each wing (columns 2-3 and 5-6) forces zugzwang: block the left, lose the right.
Think of the rectangle as your finishing move: your even-column development builds it silently until the board tightens and it converts into the winning double threat.
The "Copy the Center" Trap
Beginners as Player 2 often decide to copy the first player — mirror every move and hope the game stays even. Against a center opening, blind copying loses fast: when you copy, you hand them every odd row, and an uncontested odd-row threat is a first-player win.
There is exactly one copy that works: the center stack. When they open center, your "copy" — column 4, on top of theirs — is correct, because it claims row 2, and row 2 is yours.
The trap is continuing to copy. Mirroring their second move across the board (they play 5, you play 3) against a center opening gives away your central claim and tilts the game their way.
- Copy the center once (row 2).
- Stop copying. Every move from here fights for your even rows.
- If they abandon the center, take it — it is the most valuable real estate for both players.
Mirror tactically, never blindly — copying is for stealing parity squares, not a strategy.
When to Flip the Game: Diagonal Plays
Here is what the odd-even strategy hides: diagonals break the column-parity fight. A diagonal's four squares alternate between odd and even rows, making it the wildcard that flips a drawn game into a win.
Your even-row threats force the first player to answer on the columns. The moment they overcommit — stacking the center, over-defending one wing — flip the game:
- Attack the opposite wing. If they over-defend columns 3-4-5, a diagonal through columns 2-3-4 or 4-5-6 is the move they are not ready for.
- Use the diagonal clamp. Two intersecting diagonal lines of three sharing one winning square — a shared square cannot be blocked twice. Set these up in the bottom rows (1-2), where they are hardest to see.
The flip works because column-based defenses ignore diagonals. Learning to read those shapes as they form is half the battle — see Pattern Recognition in Connect 4: How to Read Your Opponent.
The One Winning Exception: Player 1's Low Diagonal
If the odd-even defense is so strong, how does the first player ever win after a center opening? The answer is the low diagonal — the one pattern your even-column defense cannot cover.
The first player's winning plans all route through an odd-row threat built low on the board (rows 1-3) via a diagonal through the center column. Its completing square sits on their parity row, so unlike a column threat it cannot be answered by stacking in one column — it must be blocked at the source.
- Watch rows 1-3 from the first moves. The low diagonal is built silently over three or four moves.
- Block its completing square even at the cost of an otherwise-good move — a prevented diagonal beats a wasted turn.
- Never let them hold two odd-row threats at once — one you can block, two is zugzwang, and zugzwang ends the game.
Hold the line against the low diagonal and you hold the draw. Force them to spend extra moves on it and you gain the tempo to build your own even-row finish.
How to Beat the Connect 4 AI as Player 2
Most Connect 4 AIs — including the ones on this site — use minimax search with alpha-beta pruning, ordered toward the center columns. They are tactically sharp but depth-limited: they see a few plies ahead, not the whole game. That is your opening.
- Create two threats at once. A depth-limited AI blocks the most obvious threat. Present two and it blocks one; you win with the other. The 3x2 rectangle exists for this.
- Build even-row threats quietly. Evaluation functions count three-in-a-rows, but your even-row threats look harmless until they are forced — past the AI's search horizon.
- Do not feed it odd rows. It will happily build an odd-row threat if you hand it one. Every odd-column move is an invitation.
- Punish non-center openings. If the AI opens anywhere but center, take the center and convert — that position is yours to win.
- Survive the perfect player. Against the hardest AI, take the draw the odd-even defense offers and punish the first misstep — strong AIs lose on their mistakes, not your magic.
For the full playbook against the site's toughest opponent, read How to Beat the Impossible Connect 4 AI: Strategies That Work, then warm up on Connect Four vs AI.
Frequently Asked Questions
Is it better to go first or second in Connect 4?
Mathematically, first — the game was solved in 1988, and with perfect play the first player wins by opening the center column. But "better" depends on the opponent: most players and AIs make opening mistakes, and a second player who knows the odd-even strategy punishes them. First is the theoretical edge; second is where the practical wins are.
How do I beat the Connect 4 AI?
Create double threats the AI cannot search past. Depth-limited AIs block the most obvious threat, so build two winning squares at once (the 3x2 rectangle is the classic setup), keep threats on even rows where the AI undervalues them, and take the center if the AI does not. Against the hardest AI, play for the draw and punish mistakes.
Can Player 2 ever force a win in Connect 4?
Only if the first player blunders. Against a perfect center opening, Player 2 cannot force a win — the solution is a first-player win. But if the first player opens on an edge column (1, 2, 6, or 7), the position flips and Player 2 can force the win. Against any human, this defense converts small mistakes into wins.
What is zugzwang in Connect 4?
Zugzwang is being forced to move when every move makes things worse — usually because the opponent holds a threat you must play below, letting them win next turn. The player who controls the zugzwang decides how odd and even squares are divided, and wins the endgame.
Why are even rows so important for Player 2?
Turn parity. Player 2 moves on even turns, so in any contested column the even rows (2, 4, 6) are Player 2's by nature. A threat that completes on an even row cannot be filled first by the first player — they would have to play the odd row below it, which hands you the game.
Summary and Key Takeaways
- Connect 4 is solved: with perfect play the first player wins — but only by opening the center column.
- The odd-even strategy is everything: Player 2 claims even rows (2, 4, 6); Player 1 takes odd rows (1, 3, 5). Build threats only on your rows.
- After a center opening, answer in the even columns (2, 4, 6) — starting with the center stack that claims row 2.
- The 3x2 rectangle creates a double threat that cannot be both blocked; "two stones in the second row" is its Player 2 form.
- Never copy the first player's moves blindly — the one correct copy is the center stack.
- Block the low diagonal early — it is the one pattern your even-column defense cannot stop.
Apply Your Strategy — Play Connect Four
Put the odd-even strategy to work against the AI — open as Player 2, hold the even columns, and punish every first-player mistake. Every game is a chance to refine your parity instincts.
Play Connect FourNew to the other side of the board? Play first on Connect Four and open in the center column.