Checkers Traps: Sneaky Moves to Win More Games

Discuss this article with your favorite AI assistant
Direct Answer: The fastest way to win more checkers games is to stop playing move-by-move and start setting traps: the 2-for-1 exchange, the fork, and the double-jump bait. Every trap on this list works because captures are forced — your opponent cannot decline a jump, so you can dictate exactly where their pieces land. Learn these three patterns, and you will convert casual opponents and shallow-depth AIs in minutes.
Why Traps Work: The Forced Capture Rule
Everything in this article hangs on one rule: if you can capture, you must capture. In American checkers — the 8x8, 12-man version played on this site — a jump is never optional. When your opponent leaves a man adjacent to one of yours with an empty square behind it, they are obligated to take it.
That obligation is a gift. It means you can bait a capture you want to happen, because the forced jump lands their man exactly where you planned. Traps are simply positions where the opponent's only legal move is the move that loses. If you understand the forced capture rule but still feel shaky on the basics, Demystifying Forced Captures: The Checkers Rules Explained is the perfect refresher.
Two more rules matter before the traps: multi-jumps continue automatically, and a man that reaches the far back row becomes a king (which moves and captures backward too). The strongest traps — including the 2-for-1 — use the multi-jump rule against your opponent.
The 2-for-1 Exchange: Trade One Man for Two
The 2-for-1 (also called a "two-for-one shot") is the first trap every improving player should master, because it is simple, safe, and wins material in the first dozen moves.
How it works: you leave a man exposed on purpose. Your opponent is forced to jump it — that is their obligation. But the landing square for their jump places their man directly between two of your men, with empty squares behind both. Now your multi-jump is forced: you leap over their man and keep going over the second one. You gave up one man and took two — a net gain of one, plus a stronger position in the center.
The classic setup appears on the third and fourth rows near the center of the board. Your bait man sits one square diagonally in front of theirs, so that after they jump, they land on a square where two of your men attack it. The trap is so common that experienced players call it the "checker's handshake" — both players know the shape, and whoever misplays it loses the material.
- Spot it: look for an enemy man that can jump one of yours and land between two of your men.
- Set it: build the shape two or three moves early so the bait looks like a natural, careless move.
- Avoid it: before jumping, count what happens after your jump lands. If you land between two enemy men, you are walking into the 2-for-1.
The Fork: One Man, Two Targets
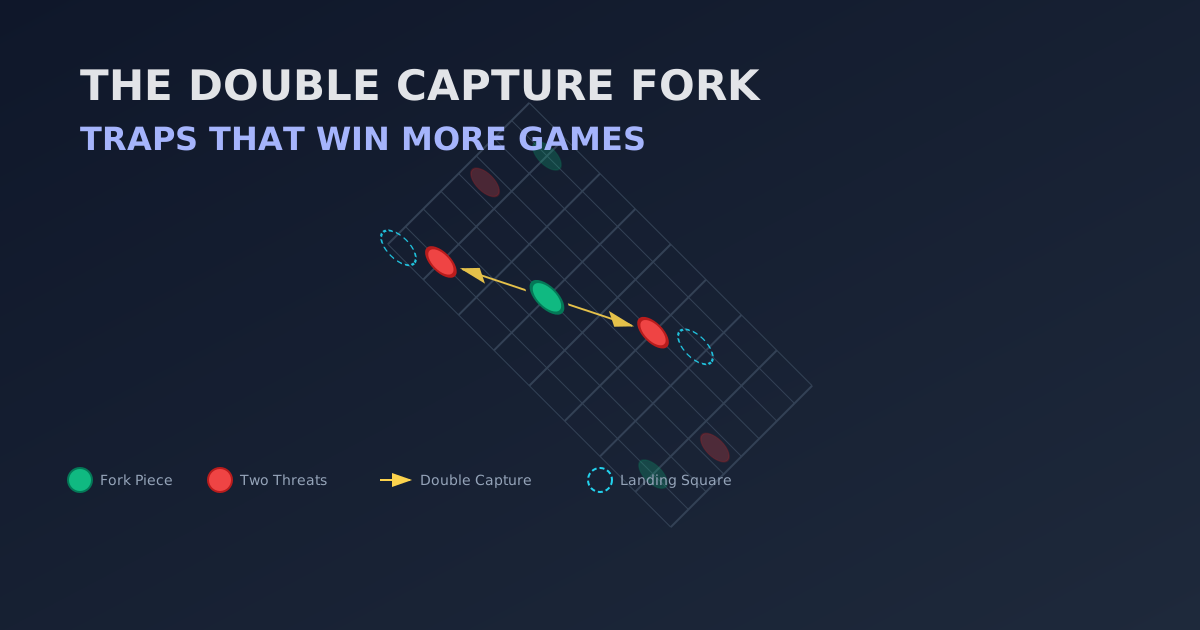
A fork is a single man positioned to capture either of two enemy men on the same turn. Because the opponent can move only one piece per turn — and because captures are forced — they must choose which man to save. You take the other one.
Where forks live: the edges of the board and the corners. A man on an edge square can be attacked from only one diagonal direction, which makes it a natural target for a fork. The classic shape: your man sits on a square adjacent to two enemy men, each with an empty square behind them. Whichever one they move, you jump the other.
The fork gets even nastier with a king, because kings capture backward. A king placed behind the enemy's front row can fork two back-row men, and since those back-row men are one move away from crowning, the opponent is squeezed between losing material and losing position.
The best defense against a fork is prevention: keep your men connected so no single enemy man touches two of yours. Gaps in your formation are invitations — see How to Play Checkers Online: The Complete Beginner's Guide for the opening formation that avoids the gaps entirely.
The Double-Jump Bait: Sacrifice Now, Feast Later
The double-jump bait is the trap that feels like magic the first time you pull it off. You offer your opponent a man — sometimes even two — and they take it, because taking is forced. Then their landing square sits at the start of your chain: you capture twice, three times, sometimes four times in a single turn.
Why it works: your opponent only sees the immediate jump. They rarely look past the landing square to count your available jumps afterward. The bait works best when the landing square is crowded — your men around it, theirs exposed behind it.
A strong variation is the sacrifice chain: you give up a man on the left edge, and the forced capture drags their piece across the board into the middle of your formation, where three of your men wait in a line. One jump becomes a triple jump, and the game turns in a single move.
- Count before you bait: make sure the chain is actually a net gain. Losing one man to take two is good; losing two to take two is a wash.
- Set it on the side: edge-of-board chains are harder for opponents to spot and harder to defend.
- Never bait a king: kings move backward and will escape your chain before you finish it.
Corner and Edge Traps: The Immobility Play
Not every trap wins material directly. Some win by paralyzing your opponent. A man on an edge square has only one forward move available — it is half a piece. A man pinned against the corner can be worse than useless: it blocks its own side.
The corner trap works like this: you force two enemy men to the edge of the board, then place your men so that neither can move forward without being captured. The opponent must spend turns shuffling men around the trap, while you develop freely in the center. By the time they escape, you have two extra men and all the space.
A subtler version is the waiting move: in a locked position where neither side wants to move, you find the one safe shuffle that forces your opponent to break the formation first. That break is usually a capture — into your trap. Waiting moves are the endgame cousins of opening traps, and they decide games that reach the final few men. For the deeper endgame version, Checkers Midgame Strategy: How to Control the Board After the Opening shows how to convert a trapped position into a forced win.
King Traps: The Squeeze and the Sacrifice
Once kings appear, the traps change shape. A king's backward movement makes it far harder to trap — but not impossible. The two king traps that decide most advanced games are the squeeze and the king sacrifice.
The squeeze: two of your kings sandwich one enemy king against the edge or corner of the board. Their king has one or two legal moves, and every one of them lands next to one of your kings. Since captures are forced, whichever move they choose, you capture — and a lone king with nothing behind it becomes a two-king endgame win for you.
The king sacrifice: you give up a king to drag the enemy king into the center, where your remaining king and two men finish it. It is expensive, but in a losing endgame a well-timed king sacrifice can flip the result. Never be afraid to trade a king for a winning position — material matters, but position wins games.
For the full breakdown of how kings turn a game around, read Mastering the Checkers Endgame: Trapping Kings and Finishing Games.
Setting Traps Against the AI
The computer opponents on this site are a perfect training ground, because they have one weakness you can exploit: limited search depth. The Easy AI searches only one move ahead — it sees the immediate capture and nothing else. The Medium AI looks about three moves ahead. The Impossible AI searches six moves deep and is genuinely tough — but even it can be trapped.
- Against Easy (depth 1): the double-jump bait works nearly every time. The AI only sees the first jump and never counts the chain that follows. Sacrifice a man anywhere near its formation and collect two.
- Against Medium (depth 3): the 2-for-1 exchange still works, because the AI sees the exchange but underestimates the positional damage. Forks are your strongest weapon here.
- Against Impossible (depth 6): single traps fail — the AI sees them coming. Use layered traps: set one trap that, when blocked, reveals a second trap. The AI defends the first and walks into the second, exactly like a human would.
If you want to know exactly what each difficulty does under the hood — and how to beat each one consistently — How to Beat the Checkers AI: A Complete Difficulty Guide walks through every level with concrete tactics.
How to Avoid Falling into Traps
You cannot set traps reliably until you stop walking into them. Every trap on this list has the same tell: a capture that seems too easy. Train yourself to pause before every jump and ask three questions.
- Where does my man land? If it lands between two enemy men, expect the 2-for-1 and decline the jump.
- What captures does the landing square unlock? If your jump completes a line of enemy men behind you, the double-jump bait is on.
- Why is this man exposed? Strong players rarely leave free captures. A hanging man is usually a hook.
The same discipline protects your edges: keep your formation compact, avoid single-file columns, and never leave two men on the same diagonal one square apart with nothing behind them — that is the exact shape the fork needs. Think of every capture as a transaction: what you gain now, and what the landing square gives your opponent.
Frequently Asked Questions
What is the most common trap in checkers?
The 2-for-1 exchange is the most common and the most important. You sacrifice one man, your opponent is forced to capture, and their landing square exposes two of their men to your double jump. It appears in nearly every game at every level, so mastering it — and spotting it — pays off immediately.
Why can't I decline a capture in checkers?
Because the forced capture rule is a fundamental rule of American checkers: if you can jump, you must jump. That rule is exactly why traps work — your opponent cannot refuse the bait. Some casual variants allow declining, but the competitive and online versions always enforce it.
What is a fork in checkers?
A fork is one of your men positioned to capture either of two enemy men. Since the opponent can move only one piece per turn, they save one man and you capture the other. Forks are strongest near the edges and corners, and deadly when made with a king that can capture backward.
Are there traps you can set in the opening?
Yes — the 2-for-1 exchange often appears within the first ten moves, and the classic opening trap leaves a bait man on your third row that dares the opponent to jump. The most reliable opening plan is to develop normally and invite the trap shape rather than forcing it. Premature traps against strong players get punished.
Can traps beat the Impossible AI?
Single traps rarely work against the depth-6 Impossible AI, but layered traps do — setting one trap that, once blocked, reveals a second. The AI searches deeply but still evaluates the board heuristically, so forcing it into a two-option position where both options lose is a proven way to beat it.
Summary and Key Takeaways
- Captures are forced in checkers — that single rule is the engine behind every trap.
- The 2-for-1 exchange (sacrifice one, take two) is the most important trap and appears in almost every game.
- A fork is one man attacking two targets; the opponent can only save one.
- The double-jump bait offers a man to trigger a multi-jump chain — strongest along the edges.
- Corner and edge traps win by immobilizing pieces rather than capturing them.
- Kings change the trap shapes: use the squeeze and the king sacrifice in the endgame.
- Against AI, match the trap to the depth: baits beat Easy, exchanges beat Medium, layered traps beat Impossible.
- Before every capture, ask where your man lands — if it lands between enemies, it is a trap.
Put the Traps to Work — Play Checkers
Open a game right now and practice the 2-for-1 against the Easy AI — then work your way up to Impossible with layered traps. Every game is a chance to sharpen your pattern recognition.
Play CheckersNew to the board? Start with How to Play Checkers Online: The Complete Beginner's Guide.